

We have all been patiently awaiting the slow and gradual re-opening on the economy after the recent COVID-19 pandemic that has impacted life on a global scale. As society will begin to slowly recover, so will the economy. Along with this, will come the re-opening of small businesses and office spaces across Ontario. Although many will be thankful and eager to return back to work, we must not forget to continue to follow safety precautions and guidelines. This is where we can help.
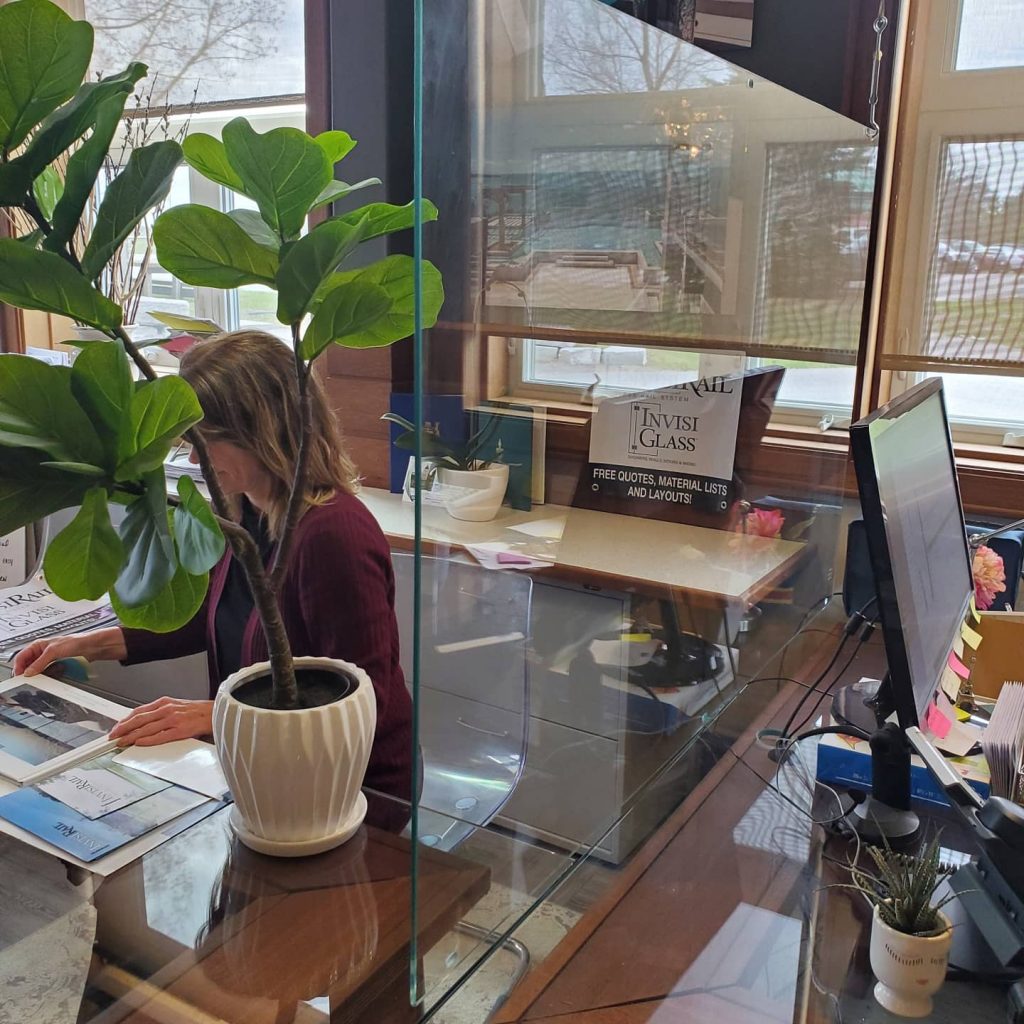
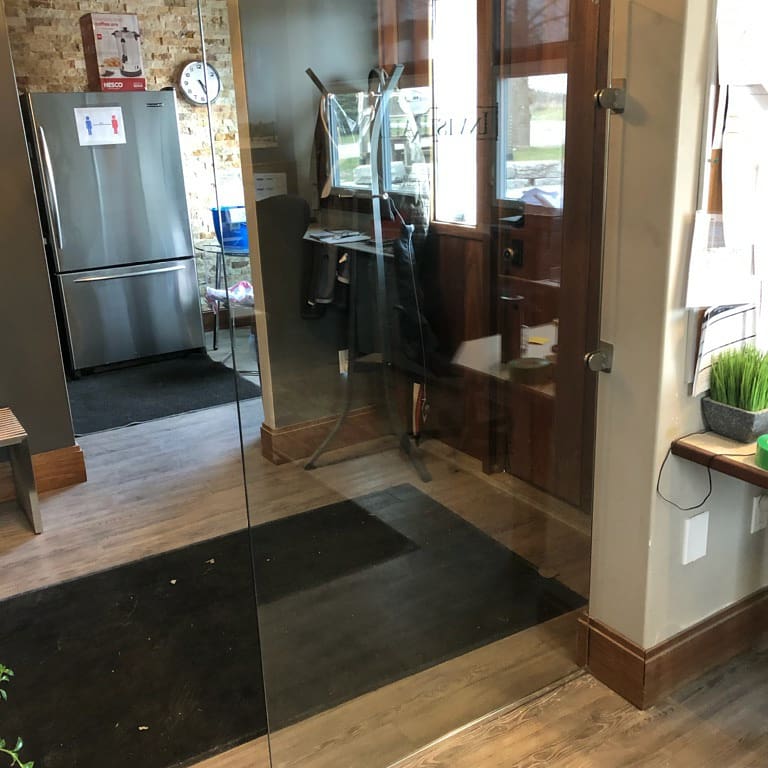
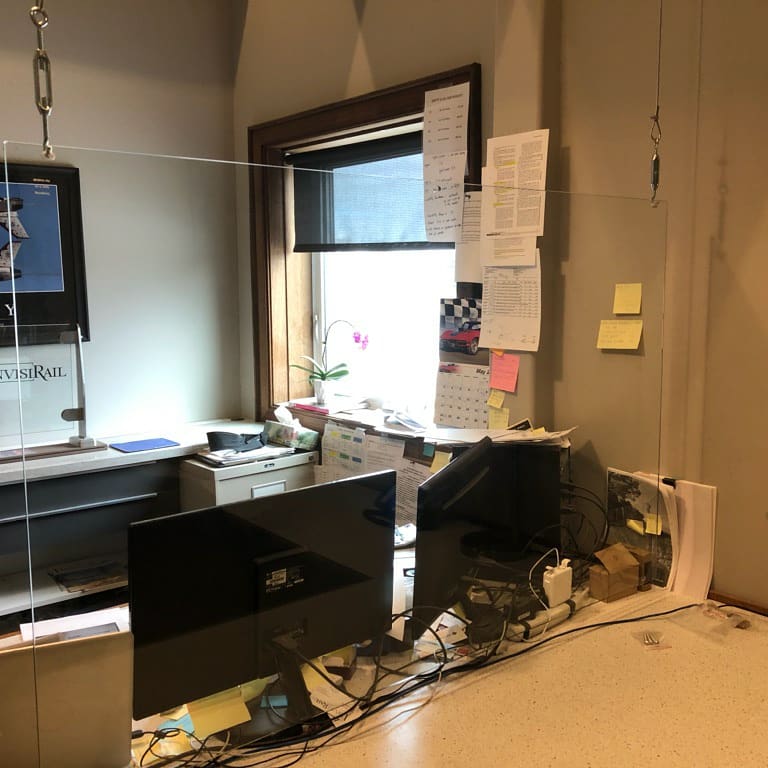
The InvisiRail glass railing system, specifically the new Invisi-Shield, can be a safe, and efficient way for small businesses and office spaces to create barriers between people, workspaces and desks. The Invisi-Shield is able to create a safe barrier in order to block any germs from spreading, which is crucial to keep both employees and customers safe, now more than ever.
Why use Invisi-Shield over plexiglass?
Although plexiglass is also a popular approach used to create barriers, many are unaware that plexiglass is a porous material, meaning that it will absorb material from the air, making it impossible to completely clean. However, by using a real glass barrier, you can ensure a deep clean surface, which will not fade under UV sun rays.
Contact InvisiRail at sales@invisirail.com, as we are offering discounted prices and fast production of all Invisi-Shield products.

When you are planning and building your deck a lot of consideration should go into designing the deck of your dreams. Once you begin designing your deck you will need to determine what your budget is, what material you want to use, the area of your yard you want to build it and whether or not it is a project you want to do it yourself or hire a professional. If you have not read Part 1 of What You Need to Know About Decks check it out to find out more things you should know if you plan on adding a deck to your home.
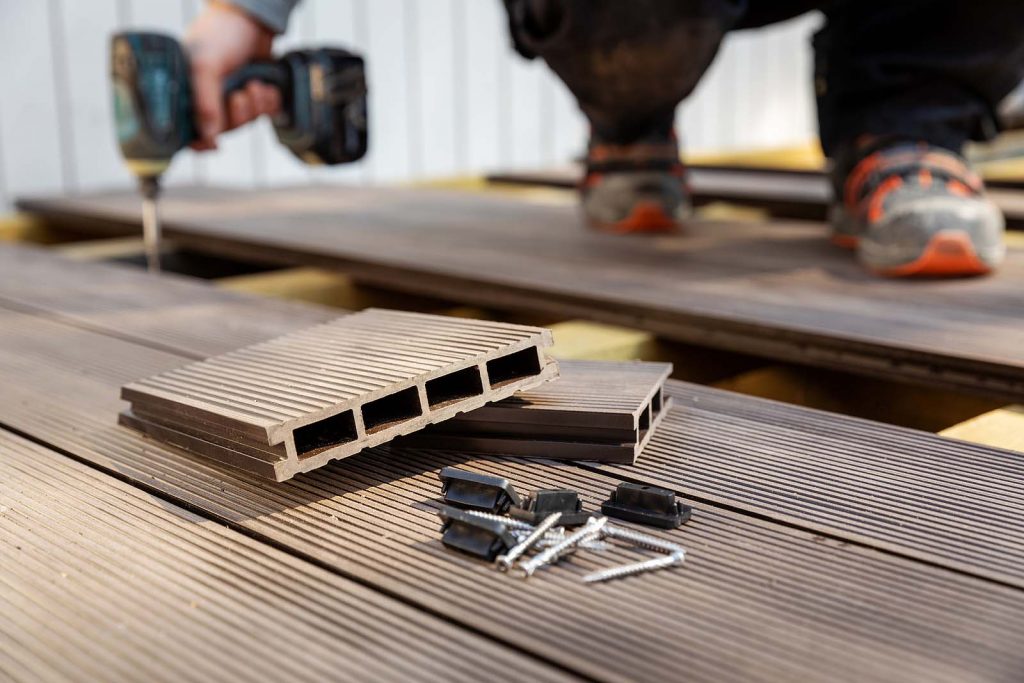
Decking is the floor surface of the deck and is one of the most important parts of any homeowners’ deck. In addition to being one of the most aesthetically pleasing parts of the deck it is also where the majority of the contact with the deck will be made. For a while whenever homeowners decided to add a deck to their home the decking material was primarily made of wood like Red Balau which has a natural beauty but requires a significant amount of maintenance, but can also be made with a variety of materials like composite, vinyl and aluminum. So whatever your budget may be you are sure to be able to find the perfect type of material for you. Before deciding which type of material you want you should take into consideration your home’s climate, your budget, as well as what you intend to put on your deck like pizza ovens, furniture, etc. because you will want to choose a material that will be strong enough to support them.
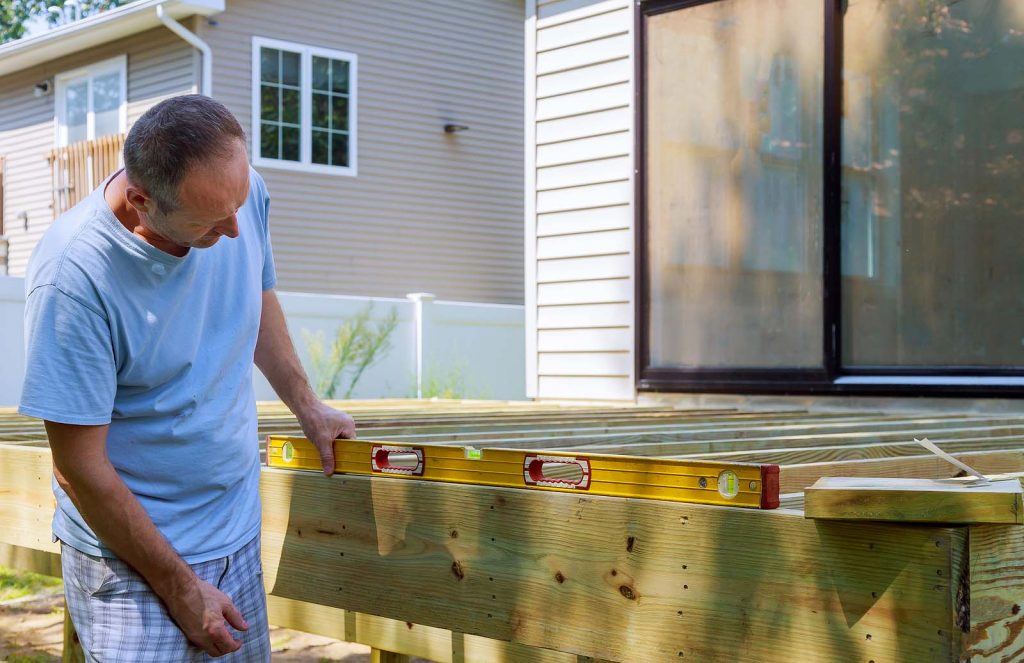
Another way you can make your deck attractive is by adding an appealing rail system. Railing is often the first thing that you see when looking at a deck so it is important to choose a rail that will complement your decking material and the style of your home. There are many choices of colors, styles and accessories available which make your options almost endless. Most railing systems are made from composite or metal which are very low maintenance but a bit traditional for those who want a more modern look while cable and glass railing like Invisirail are very modern and aesthetically pleasing. Because railings are such an important part of any deck you should do thorough research when deciding what type of rail system you want to use.
If your deck is a certain height off the ground then you will be required to have stairs or face the wrath of the IRC. When building stairs for your deck you will have to make sure you follow every requirement set by IRC which uses building inspectors to strictly enforce all building codes. The minimum width for stairs is 36” but a good width for you to have plenty of room is 48”. The minimum rise required is 4” with the maximum being 7 ¾”. The best way to make sure your stairs fit perfectly with your deck is by planning ahead and making sure all of your stairs measurements are the same so you won’t fail inspection by having stairs that or too tall, too short or not wide enough.
Deck lighting is a great way to add light to your deck, make it more appealing, and allow you to carry your party on well into the night. They are a great project to do yourself because they normally don’t require an electrician or contractor and usually come in kits that are easy to install. There are a variety of options for lighting to choose from like light posts, stair lights, rail lights and post cap lights. Before deciding to install your lighting make sure you read the instructions thoroughly and if you have any additional questions contact a professional who would be more than happy to help you off.
A home with a well-built deck will instantly add value to your home making it a great investment if you plan on selling your home at a later time. Along with added value decks can breathe new life into homes that may have lost their appeal over the years. Your choice in decking is very important because it is what you will see daily, walk on daily and have to live with and maintain for years to come so using all the information provided here along with researching additional information on your own will help prepare you to make the best decision for your home and your deck.


Deciding to expand your living area by adding on a deck is a common American tradition. No matter if you plan to hire a professional or do it yourself the key to a successful deck is all in the design. Picking the right materials for your budget, climate and what you plan on using the deck for are all essential things to take into consideration when designing your deck. Here are a few things you should know if you are planning on a building a deck.
Footing is very important in the design of your deck because it provides a solid foundation that will support your deck and it is the first thing everyone encounters when they use your deck. The more footings your deck has the better the total weight load is distributed and the less weight the deck has to carry. It also lightens the load that the ground will have to support. Without footings deck posts could possibly sink into the ground under all the weight the deck may be carrying. If you live in an area where it is extremely cold and the soil freezes then you will have to install the footing below the frost line to prevent it from moving when the soil freezes during the winter. How big your footings should be will depend on the condition of the soil and the climate in your area. Since footings are installed underground the material they are composed of will have to be made from material that won’t decay. The most common material footings are made of is concrete although there are multiple types of material that can be used.
When building a deck frame joists, the repeated structural members, are used. The number of joists needed is related to the number of footings and beams that will be installed in the deck. They are usually constructed in the deck with a ledger on one side of the joist and a beam on the other side. If you want to install a rail on your deck then you will need to have a larger frame that will provide more strength in the rails. The size of the joists needed is directly related to the size of the deck based on the measurements; 2×8 up to 12 feet, 2×10 up to 15 feet and 2×12 up to 18 feet. If you have an upper level deck then a 2×10 joist is the minimum size that can be used to make sure your deck will be safe and stable enough to support strong railing.
Adding a new deck to your backyard is an opportunity for homeowners everyone to extend their living room to the outdoors. But, before you go out and start planning your deck and purchasing material learning all you can about decks is a great way to stay ahead of the game. For more helpful tips and information about building a deck and all the things that go into it check out Part 2 of Everything You Need to Know About Decks.


Summer time is the time of picnics, barbecues, sunshine, and lots of outdoor fun. In some cases, a lot of bugs. Bugs can be quite annoying and even cause the spread of disease. This is especially true for mosquitoes which spread West Nile virus, malaria and other serious illnesses. They are one of the most relentless bugs out there and can cause entire gatherings to move indoors just to avoid them. Over the years, people have come up with many ways to combat them; spray repellents, oils, lotions, candles, outdoor foggers and much more. Not much seems to deter these little guys though. However, if you combine your regular summer time outdoor skin routines with other methods, you might find you finally have a bug-free outdoor oasis to enjoy.
Mosquitoes, Dragonflies, Flies and water scorpions all require stagnant water to breed. While you may not want to deter dragonflies, the rest are quite a nuisance and can be quite hard to get rid of.
There are several things you can do to fight off pests naturally. These methods can help you get and keep your pest problem under control.
Most people believe that candles, torches and other outdoor accessories don’t really work to combat mosquitoes. While their repellent properties are limited to the spaces immediately surrounding them, they do work. Here are a few accessories you can use in combination with other methods.
While all of this might seem like a lot of work, it really isn’t. Especially because most people either have these items on hand or purchase them every year. Herb gardens can serve a dual purpose and save you money on both pesticides and cooking herbs, both of which can be pretty expensive. If you happen to like crafting or one of your family members does, you could have them make candles infused with essential oils for your deck. When you take the time to combine a few of these methods, you will find that your outdoor oasis is more like an oasis than ever before.

Many homeowners ask themselves at some point “Should I add a deck to my backyard?” and the answer is of course you should. The real question you should be asking is should you build the deck by yourself or hire a professional to do the job for you? Well this all depends on your confidence in your carpentry skills, the type of deck you want to build, as well as how much you’re willing to risk if things don’t go as you plan since you will be solely responsible for anything that happens while you’re building your deck and long after if any issues come up when you’re entertaining your guests. If you want to build a simple deck that is from a pre-designed deck plan and you have average carpentry skills then you can reasonably assume that you can build your deck yourself but don’t take the building lightly because you will need to research the materials you use as well as any local codes that are in place regarding deck additions to homes. You can always head down to your local hardware store and ask a store associate for advice on the best material options available.
Free-standing decks are one of the easiest kinds of decks to build with one huge advantage. They don’t have to be attached to anything like traditional decks and honestly one of the hardest things about designing a deck is attaching it to the home since this is where lots of things like mold, mildew and dry rot like to form if it isn’t secured to the home correctly. You will have to remember even though it isn’t attached to your home there are still laws and codes that you will have to check to make sure your deck is not breaking any rules and is within all the right deck dimensions allowed. One disadvantage to free-standing decks is that they will need to have support on each side of the deck which means buying extra support posts.
Most homeowners who are considering building their own deck already have a pretty decent repertoire of tools available at their disposal but before you begin you should double check that you have the right tools and materials that you will need specifically for building your deck. Make sure you choose the right decking material and any wood you choose has been pressure-treated since most wood decking warps. You should also look for deck screws that are designed exactly for the decking material you want to use since regular nails can cause certain decking material to splinter and can hold water if it rains and start to rot or develop mold or mildew.
Other materials you will need that you should take into consideration will likely include:
Most decks are considered a major home improvement project and something that many will want to last for a long time. While designing a basic deck that you can save money with building yourself sounds good it most likely will not last nearly as long as a professionally build deck would. Having a professional build your deck also takes any liability away from you and puts it on the contractor who should always be insured.
Adding a deck to your home is a big decision to make and a huge commitment since it will be with your for at least 10 years if it was designed and built well so if you are planning on trying to build a deck yourself remember that the simpler the design the better but if you are a little uncomfortable with the idea of taking on such a huge task then you should definitely look into hiring a professional.


When you are getting ready to hire a contractor to build your deck you should thoroughly research their building history, get at least three estimates, and always ask them questions. This will help make sure that you are being dealt with fairly and that you will hire a contractor that you will be comfortable with and feel at ease allowing them to come to your home often since building a deck can take anywhere from a few weeks to a month.
There are many deck builders available for homeowners to choose from and many of the ones available are up for any job presented to them so it is up to you to choose the one that is best for you and your home. Give each deck builder you interview an equal shot at being able to complete the job and when searching choose a contractor who has a great eye for design and is still passionate about their job. Someone who is passionate about their job will take pride in their work and will do their best to deliver a beautiful, eye-catching deck.
If you decide to build your own deck then you should make sure you know how to do it correctly and so it is up to code. If you decide to hire a deck builder then here are some questions to ask them so you can be sure that you will be getting the best person for the job.
Another great way to make sure you will be choosing the best deck builder is to ask their past customers about how their experience was. Some questions to ask references are:
A properly designed deck is a great addition to many homes. They provide a nice outdoor area for homeowners to relax and invite guests over for entertainment. Because of the traffic your deck will receive it is essential that it is built correctly so there are no accidents or potentially harmful things that could occur. Here are some tips on how to choose your deck builder.
Building a deck is a great time for many home owners and knowing that a good contractor built it will ease your mind and make it that much more enjoyable so take your time when looking for a deck builder and always do your research.

When it comes to adding a deck to your home they already instantly add value to your home but if you were to make sure that your deck was eco-friendly you could not only add more value to your home but help protect the environment. After all, what’s more green than designing a place where you will be spending time outside with nature? Most decks that are eco-friendly are low-maintenance and last a long time.
Many people don’t waste a second thought when they decide what material they want to use to design a deck, but if everyone would take the time to choose materials that are beneficial to our environment then the world would be a much better place both economically and environmentally. Going eco-friendly means less waste for the environment and a longer deck lifespan for home-owners. Imagine the piece of mind you will have knowing that you designed a deck that’s your dream deck as well as eco-friendly.
Most of the time when people hear the words “green” or “eco-friendly” they immediately think that it will cost them more but that is not always the case. When designing your deck the initial cost for eco-friendly material like PVC will be more than conventional deck material like wood but in the long run you will end up spending less since you will not have to buy cleaning products as often and the material itself lasts longer than others.
Eco-friendly materials are those that have not been in contact with harmful chemical treatments like pressure-treated woods. PVC decking is extremely eco-friendly since they are made out of recycled materials. They don’t need to be treated, painted or sealed and can come in gorgeous stains that can mimic the appearance of wood like Trailways PVC decking.
Other materials you can use to make sure your deck is eco-friendly are solar lighting products like Pegasus or Polaris. They can charge all day and then light up the night for you well into the late hours and you won’t even have to use any energy doing it.
One of the biggest challenges to designing an eco-friendly deck is finding decking material that doesn’t contain any harmful chemicals. Here are some tips to help you get started building your eco-friendly deck.
Going green for anyone can seem a bit overwhelming at first but once you have the knowledge you need and the items to match there’s no reason you shouldn’t be able to build the deck of your dreams that’s good for the environment as well.


In the summertime there’s nothing quite like a deck for cooking out, entertaining, or simply relaxing. In addition to boosting outdoor living space, a deck can be an asset when you sell your home. Adding a deck will give you a significant return on your investment, depending on where you live and size of your deck and according to the 2014 Cost vs. Value Report from Remodeling Magazine. Planning a successful deck requires careful consideration of your site, your budget, and the features you should or shouldn’t include. Here are some things you should keep and mind and use when evaluating your home and determining whether or not you should add a deck.
Your deck will be a popular place, so give careful thought to where it should be located. Begin by working out how to access it from the house. The ever-handy back door to the kitchen probably won’t do the job; it will force traffic toward the cooking area, making a shambles of any large-group entertaining. A better solution is a French door or slider that gives primary access from a living room, dining room, or family room while being handy to the kitchen. If the doorway can also be positioned to offer an expansive view, all the better. Next, make sure the deck neither swamps your yard, nor becomes lost in it. Your local codes may set standards for how much of your lot can be occupied by a deck, and how close a deck can be to your lot line. Check these limitations early in your planning with your city or county building department. Decide where to locate stairways off the deck so they provide unobtrusive access to the backyard. Also consider the path of the sun and the location of shade trees; sunlight may be pleasant in the morning but unbearable later in the day — having a shade tree to the west of your deck will help block the harsh late-day sun. Work out how to preserve your privacy and how to screen your deck from prevailing winds.
If you are considering a deck the size of a helicopter landing pad, with all the additional bells and whistles imaginable, then you better think again. Extravagant does not always mean better and in the case of decks simple is easiest and the best looking. For example, a medium-size (16-by-20-foot) deck made of pressure-treated wood provides the best return, averaging about 87% nationally. PVC decking (Trailways, Passport, and Tongue & Groove are some well-known brands) makes great sense from a maintenance point of view but will be more expensive than other types of material. Composite material costs about 45% more than pressure-treated wood and will allow you to recover an average of 74.3% of your cost to build it if you choose to sell your home. If you own an upscale home, a more decadent deck may be appropriate to keep up with the Johnsons, but don’t expect a high pay back: A two-level, 400-sq. ft. deck with upscale features such as composite decking, decorative railings, and built-in lighting offers only a 65.1% pay back. Hankering for an even higher return? If you’re reasonably handy, you might want to go for the gold and build the deck yourself. Labor costs typically make up more than half the cost of residential construction. That means you can spend as little as $4,000 in materials for a wood deck of mid-range size and come away with a resale value of more than $8,000 a reasonable return. However, plan on spending four to six weekends building a 16×20 foot deck yourself. If you choose this route, consider buying a ready-made deck plan. Or, put to use one of the many websites with interactive design aids, such as Lowe’s Deck Designer, and Deckorators.
To recoup a good portion of your investment, your deck needs to be right for your market. Appraiser Dick Koestner of Davenport, Iowa, recommends the simply checking out other decks in your area. “Don’t make it too extreme [compared with] what’s typical in your market,” he counsels. “Definitely don’t make it less than what is expected in the market.” Koestner also emphasizes the importance of obeying local codes. “A lot of potential purchasers are having a home inspection done,” he says. “If the home inspector finds the deck isn’t built to code, most of the purchasers are saying, ‘Hey, fix it.’” He emphasizes that codes exist not just to preserve property values, but promote safety. For example, railing balusters spaced too far apart can constitute a falling hazard for small children (most codes stipulate 4-inch maximum gap). In addition, a deck inadequately attached to the house can collapse, often during a party when the structure is loaded with the extra weight of many people, creating mayhem like something out of the Poseidon Adventure. So get a permit from your building department and follow their requirements. Of course, by dint of taking out a building permit your tax assessment will rise, but only to the extent that the value of your property is increased. The effect should be minimal: Decks are considered an outdoor improvement much like a new driveway or upgraded landscaping, not additional living space.
Although it’s hard to put a dollar value on how to make your deck look amazing you should take some time and think about how it will blend in with the design of your house and the layout of your backyard. You may decide to add railings to give it some pop and complement your home or some lights to make it stand out long after the sun goes down.

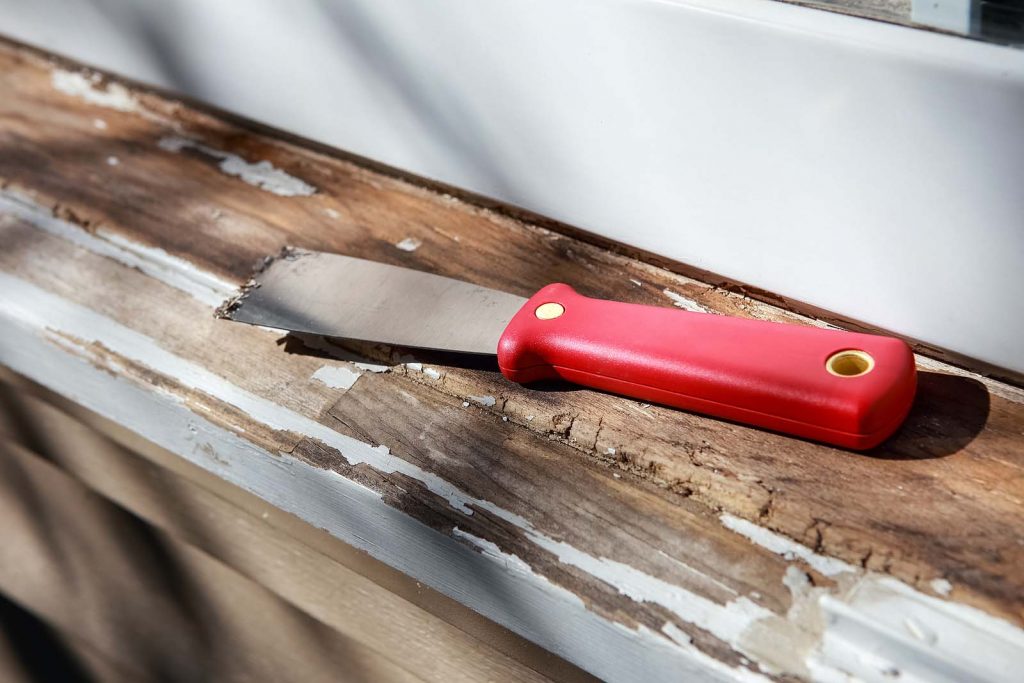
Dry rot is a tricky enemy to fight for many homeowners. It is a fungus that can cause mildew, mold, staining, or decay in wood and like any fungus, all that’s required is some heat, moisture, dirt, and a dark place to grow. Here are some tips to help you determine whether or not your deck suffers from dry rot and what you should do to prevent it.
Though it loves the outdoors, dry rot can happen inside the house as well: under sinks, around windows, within shower stalls, on door frames, in the attic. But it often occurs in thresholds between a home’s interior and exterior because it thrives on outdoor structures, such as fencing, wood siding, eaves of roofs, and of course, decking. However, before looking for a solution, you must try to find every trace of it so it doesn’t continue to grow and enter into the home. A licensed professional should be able to conduct a thorough inspection of dry rotting decks, paying special attention to earth-to-wood contact, such as posts and under potted plants. They should also check out your house’s foundation, siding, and interior.
It often appears grayish and covers surfaces in long sheets of mold. But sometimes the wood will simply look dark and decayed. In this case, it’s important to determine if its fungus or pests causing the damage. Sometimes it could be a combination of both since dry rot can attract termites and other wood-eating insects. But often the main problem with dry rotting decks is that you cannot see all the fungus. Therefore it’s a good idea to hire a professional who is trained to detect all areas the disease may be hiding.
Portions of the dry rotting deck must be immediately removed and replaced. However, as we’ve said before, you must be able to detect everything. Simply replacing the visually damaged areas won’t do any good if there is an adjacent piece of lumber infected. The disease can spread and immediately contaminate the new installations. So make sure you have a professional who is trained to find the unseen corrosion and immediately substitute it with fresh wood.
Dealing with dry rot doesn’t end once you remove it. Just because you found it all and replaced the infected pieces doesn’t mean your decking is safe. You have to find out where the source of the problem occurred so it doesn’t happen again. Look for plumbing leaks in and outside the home (especially around hoses and faucets). Inspect your gutter system for proper alignment. Check out your eaves to see if they are correctly installed. Examine the grading of your yard so water won’t collect at the home’s foundation. Also, look to see if your sprinkler system is appropriately placed: maybe it’s hitting the exterior of your house, causing unnecessary over-saturation. Also, keep up with maintenance issues: ensuring the wood is clean from dirt helps to prevent a fertile soil for disease. And make sure to treat your decking with wood preservative to help seal it and keep the moisture out.
Wood rot is a common problem with hardwood decks that have been installed with screws that have been vertically installed right into the decking. People falsely assume that just because a nail or screw fit into a hole, that nothing could also enter that hole. Unfortunately, water is an element that damages wood and is a major reason why mold and mildew are also common problems for wood and composite decks. When it rains on your deck, water tends to accumulate around and seep into screw and nail holes. As the water literally sits in the hole, microorganisms work their magic and rot starts to occur. LivBuildingProducts has a Rot Not Protection Deck System that allows water to run off and away from the deck’s joists and and plank connections so the water doesn’t sit and make the perfect environment for rot. You can also help prevent rot from occurring by using materials like Tiger Claw hidden deck fasteners that don’t swell up or retain water like deck screws do and are specifically designed so that your deck remains durable and sturdy enough to last for years.
So when it comes to protecting your outdoor decking from rot remember to inspect your deck often, detect and determine whether or not you are looking at dry rot, remove it and use products to help prevent it from returning otherwise you could end up having to completely replace what was once a beautiful deck.

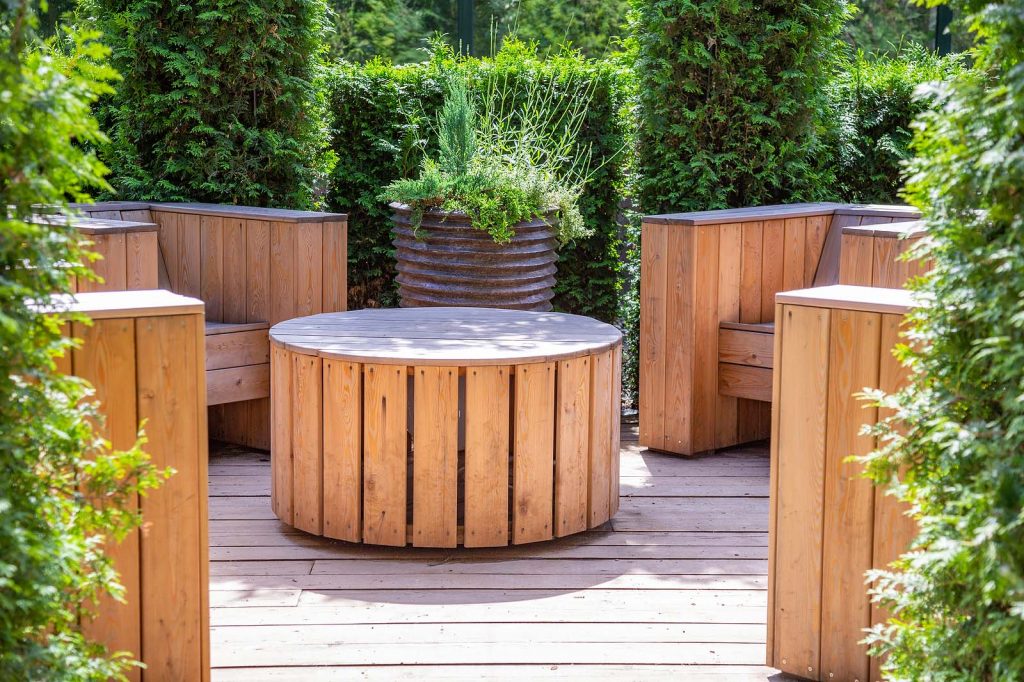
Whether you have a tiny balcony or extensive garden, you should always be able to step outside your home and step into the perfect outdoor retreat. If you have been tempted to spend more time outdoors then adding an outdoor living space to your home is the perfect solution. You can do various things to make it completely unique to you like installing a canopy or roof, adding a kitchen or a pizza oven, among other things. Designing the perfect oasis for your home will all depend on the research and thought you put into it before even purchasing your first board.
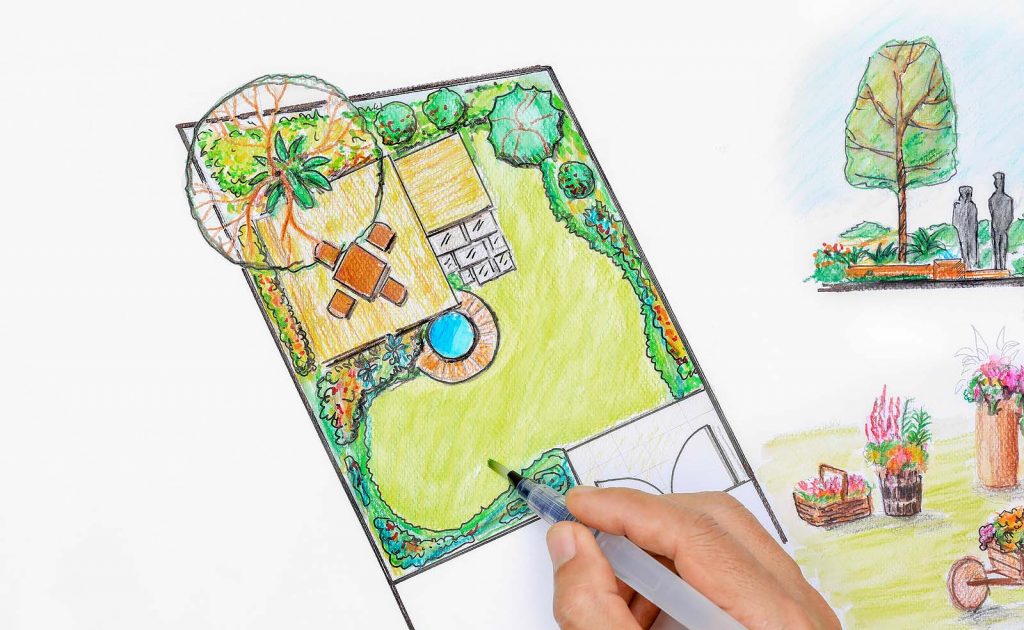
When designing a deck you will first need to decide where exactly you want your deck to be. Go outside and look at the layout of your back yard. Do you want your deck to be an extension of your home or do you want it to be freestanding? If your back yard gets a lot of sun or a lot of rain you will need to take that into consideration when determining what kind of deck material you will want to use. A great way to keep track of what you want your space to look like is by creating a scrapbook that will hold your “wish list” of the items you want. Take into consideration the lifestyle you live or want to live when your deck is finished when designing your deck. Do you want to have your deck be open and big making it perfect for parties and late-night star watching? Do you want it to be an enclosed space so that you can host private dinners and get-togethers without worrying about your neighbors watching or being disturbed? Or do you want a closed off room that’s meant to be an extension to your living room so you and/or family can have more room for entertainment? Whatever the reason for adding a deck to your home you will find the options available to help you do it.
If you plan on entertaining company and hosting parties at your home you will need to have a table large enough to entertain them as well as enough comfortable chairs for all your guests to sit on. You will also need to consider all the extra things you will need as well. If you want to cook outside you will have to build an outdoor kitchen that will let you easily cook an entire meal for your guests as well as a refrigerator or cooler to keep your beverages nice and cold.
Before you go out and just start purchasing deck accessories just because they look pretty, take a moment and set a budget that is simply for deck extras and separate from the money you will use to actually build your deck. If your budget is low you can always purchase add-ons like Invisirail railing (if you are not required to) later but your main focus should always be on getting your deck built. Once you have your budget set up go around and visit local home department stores and outlets with your scrapbook and see how much they charge for the items you want to get. Then, go online to the manufacturer’s website and see how much they charge and whether or not they have a product similar to what you want at a lower price. Once you’ve done your research determine which items you can afford and absolutely want and mark them in your scrapbook. Don’t go to one store and simply pay what they’re charging because costs vary widely among stores and you could pay almost double for an item if you don’t compare prices among stores.
Food Preparation Accessories
Many deck owners add items like a fire pit, a barbecue grill or a pizza oven in order to make meals outside but there are a number of other items that can help you create meals or handle food outdoors like; a cocktail bar, a sink, a dishwasher and/or a refrigerator.
Furniture
For outdoor atmosphere you will want to purchase weather-resistant furniture that can include; a table, chairs, hammocks, shade umbrellas, and more.
Lighting
Not all get-togethers stop when the sun goes down so lighting can help keep the party going well into the night. There are lighting options like built-in step lights, post cap lights, candles, and more. You can even add a roof to your deck and add a ceiling fan with lights if you want. The choices are almost endless.
So, no matter what your budget is or what your design ideas are, your goal should be to create an outdoor space that connects to you, your lifestyle, as well as your home and landscape. It should be a place for you to relax, feel serene and escape any troubles you may be experiencing and double as an area to entertain your guests and family.
Showcasing the latest and most in-demand products and services
Explore cottage country, all under one roof!
